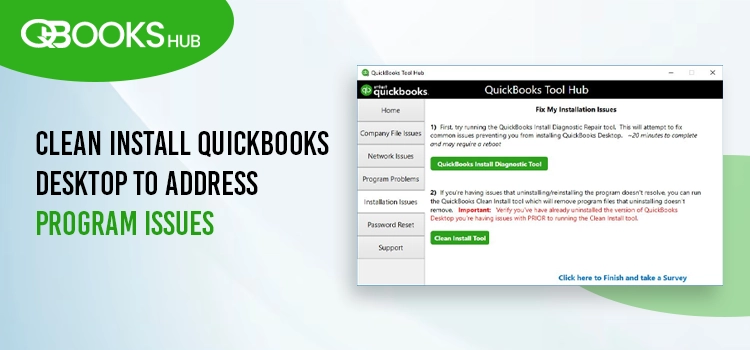
Often, users face technical bugs, errors, and performance degradation while using any software, no matter how popular and great the program is. In that case, QuickBooks is no exception and can take up much of your time in a single operation or suddenly freeze or even shut down.
To deal with such frequent problems, opt to clean install QuickBooks Desktop that installs the entire software afresh, removes the clutter and resolves performance issues. If you don’t know how a clean installation works, don’t worry. This article provides detailed step-by-step instructions for removing and reinstalling a program. Let’s overview the complete clean installation process and et started.
Prerequisites for Clean Installation
Here are some of the crucial steps you must perform before removing or reinstalling your QuickBooks program:
- Download the QuickBooks installer as the same version of your program.
- Note down your product license number noted. Check the original package of QuickBooks to find it. For an online purchase, review your purchase confirmation email.
- To ensure your company file data is safe, create a company file backup.
| Note: You can also get the information from your account management portal. |
Uninstall and Clean Install QuickBooks Desktop on Windows
To uninstall QuickBooks and install a fresh copy after renaming the leftover residual folders, follow the stepwise instructions mentioned below:
Step 1: Uninstall QuickBooks
- Tap on the Windows icon at the bottom right corner of Windows Taskbar.
- In the Windows Start menu, look for Control Panel and hit Enter.
- Go to Programs and Features.
- Tap on Uninstall a Program.
- Find your version of QuickBooks from the list of programs and then choose it.
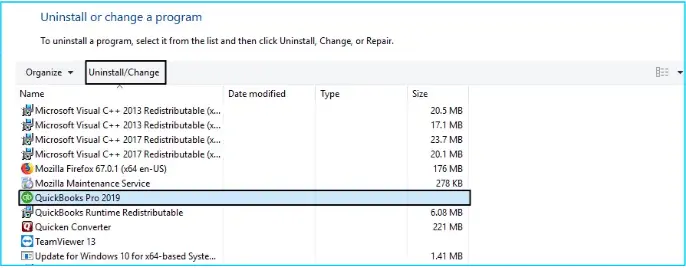
- Hit on Uninstall/Change, Remove and then click Next.
| Note: If you don’t see the option sign out to the Windows and sign in as an admin. |
Step 2: Rename the Installation Folders
- In the Windows Start menu, search for File Explorer and then hit Enter.
- Look for the QuickBooks file folder. You will see these files at: – C:\ProgramData\Intuit\QuickBooks (year) – C:\Users\(current user)\AppData\Local\Intuit\QuickBooks (year) – C:\Program Files\Intuit\QuickBooks (year) – 64-bit version C:\Program Files (x86)\Intuit\QuickBooks (year)
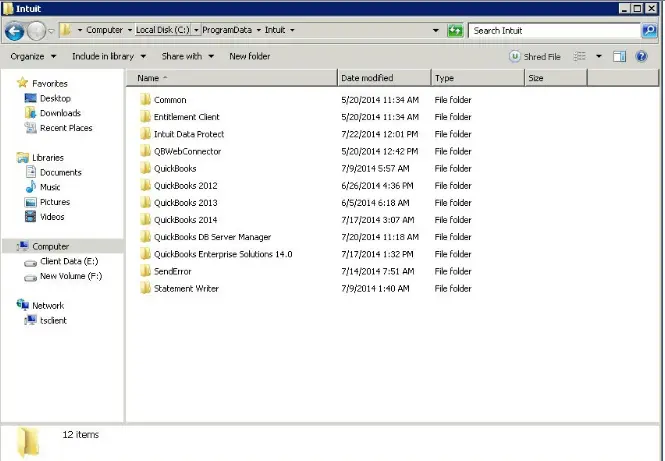
- Now, right-click the folder and tap on Rename.
- Add ‘Old’ at the end of the folder and save it. When opening QuickBooks installation file it will atomically create a new one rather than opening an old one.
Step 3: Install QuickBooks Desktop
- Ensure your computer is connected a strong network.
- Look for the QuickBooks.exe file and open it.
- Choose Express Install to ensure all the preferences are saved and install over your previous version of QuickBooks. To reinstall your previous version you will need to select Custom Install.
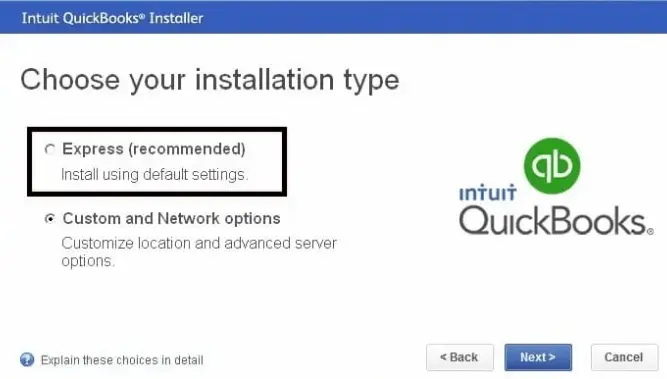
- Tap on Next and then click Install.
- Once done, restart your computer and reopen your QuickBooks to ensure the better performance.
Read More- Update QuickBooks Desktop: Enhance the Program’s Performance
Clean Installing QuickBooks Desktop on Mac
Uninstall QuickBooks Desktop on Mac and then remove the PLIST files for both users and systems by following the below steps:
Step 1: Uninstall QuickBooks Mac Desktop
- Exit QB Desktop.
- Tap on the Finder menu on your Mac and click on Applications.
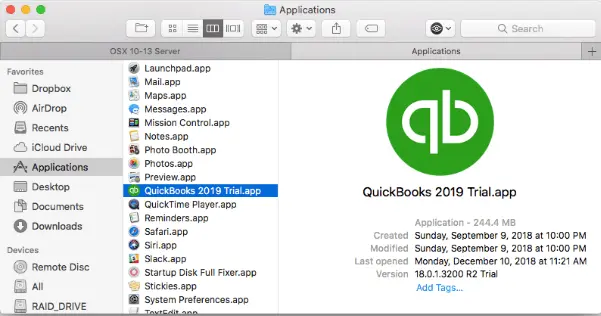
- Hold and drag the QuickBooks icon to Trash.
Step 2: Remove QuickBooks PLIST Files
In Mac, a program installs and saves the programming framework’s property lists in PLIST format for both the user and the system. So, you must delete the PLIST* files from the user and system folders. Once done, all preferences will revert to their default settings.
User PLIST
- Click on the Finder menu.
- Press and hold the Option key and then hit on Library.
- Choose Preferences from the Library menu.
- Look for the PLIST files that contains com.intuit.QuickBooks20XX, then drag to the Trash.
- Note: XX denotes the version of QuickBooks.
- Finally, empty the trash.
System PLIST
- Open Macintosh HD from a new Finder window.
- Move to Library and then choose Preferences folder.
- Search for PLIST that has com.intuit.QuickBooks20XX and drag them to the Trash.

- Tip: If you the Macintosh HD icon isn’t visible in Finder, – Tap on Preferences from the Finder menu. Then, click on the General Tab – Ensure Hard disks is check-marked.
- And empty your trash.
Step 3: Restart Your Computer
Be sure to restart your computer after deleting QuickBooks to ensure that your system has saved these changes and remains well functional.
Step 4: Install QuickBooks Mac Desktop Again
Let’s install and setup QuickBooks Desktop for Mac by following the steps below:
| Important Note: Ensure your Mac meets the minimum system requirements for QuickBooks Desktop. Keep your product and license number noted. If you downloaded a digital copy check your purchase confirmation email and look for the required details. You can also check locate your license number, if your email is lost. For a physical copy, check the scratch-off label on the package. |
Download and Install QuickBooks Desktop for Mac
- Download your version of QuickBooks Mac or use CD installation if you bought it from a retailer. If you can’t download the installer, you need to clear excessively stored browser’s cookies and caches or simply update and restart your computer.
- Ensure there is not open applications on your Mac.
- Now, open the installer or put the CD disc into the Mac drive. It will automatically open a window for QuickBooks installation.

- Hold and drag the QuickBooks icon into the Applications folder.
- In the current folder, open QuickBooks Desktop by double-clicking on its icon.
Upgrade Your Company File
During reinstallation, if you have upgraded your QuickBooks to a higher version of QuickBooks, you need to upgrade your company file version to ensure both are compatible and working well without interruption.
- Find and open your company file into the upgraded version of QuickBooks.
- QuickBooks will automatically prompts you to update the company file, hit Upgrade.
- On the prompt message on your screen, click OK.
- Finally, take a look at your balances, reports, and accounts to ensure your company file is updated successfully.
Summary
Overall, it is quite easy and beneficial to clean install QuickBooks Desktop for better user-experience and boost program’s performance. Whether you are a Windows user or a Mac user, following the above steps will surely help you eradicate the issues.
However, in complex situations such as Windows problems, if you can’t back up your company file before the process, it can seriously be a headache for you! So, consider connecting with technical experts for instant resolution. Dial +1-866-409-5111 and connect with an Advisor now!
Frequently Asked Questions
Clean installation of a software ensures that all the damaged files are removed with the fresh installation, removing software bloats, system errors, technical glitches, ensuring the seamless performance of a program.
Yes, QuickBooks Desktop can be uninstalled and reinstalled to fix general errors and technical bugs and ensure that all systems and components of the program are working correctly. Simply put, reinstalling QB can take care of program maintenance and reduce costs.
No, you won’t lose any of your data when you uninstall or reinstall QuickBooks. Rather, it enhances data security and protection from breaches.
QuickBooks Install Diagnostic Tool and Quick Fix my Program are the tools introduced by Intuit to repair QuickBooks installation. Utilizing these can help get rid of common installation errors. Moreover, performing the reinstallation of the program can also help you get rid of the problem.
There are various reasons why your QuickBooks has stopped working, including improper or incomplete QuickBooks Desktop Installation, insufficient Disk Space, QuickBooks company file connection failure, QBWUSER.INI file Corruption etc.


